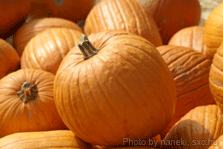
Making jack-o-lanterns is a time-honored Halloween tradition. While kids often get the most fun out of making them, people of any age can enjoy carving up the pumpkins and creating funny, scary, or just plain weird faces on them.
Even if you aren't much of an artist, you can still carve the perfect pumpkin face by using a template. Just follow the steps and tips below, and you'll be on your way to creating the perfect jack-o-lantern.
Picking a Pumpkin
 The first step in transforming your pumpkin into a jack-o-lantern is to find the right pumpkin. Keep in mind that each pumpkin is different and that very few pumpkins are "perfect." They all have bumps, flat sides, spots, and uneven coloring. Fortunately, you can always turn your pumpkin around and work on the nicest area. At the same time, you might choose to incorporate some of these imperfections into your artwork. For instance, if the pumpkin has a bump, it can be used as a wart for a witch-faced pumpkin. The shape of the pumpkins can greatly differ as well. They can be short and fat, tall and thin, or right in the middle. Choose the shape that will best match the face you want to carve out.
Tools
Once you have your pumpkin, you'll need the proper tools to carve it. Though you could use a regular kitchen knife, many stores sell special pumpkin knives and even entire pumpkin-carving kits. These kits often include several useful items, such as a:
- Pumpkin knife for carving the top
- Smaller knife for detailed carvings
- Scoop for scraping out the pulp and seeds
- Poker for transferring templates to the pumpkin
Transferring a Template
To transfer a template onto your pumpkin, you'll need to tape it onto the best side of the pumpkin. If using a smaller pumpkin, you may have to make some incisions on the paper to get the flat sheet onto the round surface. Once properly affixed, use the poker tool to go over the lines of the template, making holes along the way. After tracing every line, remove the template. You'll then be left with a series of holes to guide you as you go about carving the pumpkin. For your comfort we have provided 6 templates to choose and make a jack-o-lantern.
Jack-O-Lantern Carving Templates
Cutting
The first step in cutting your pumpkin is to cut a circle around the stem. You can draw a circle on the top of your pumpkin to use as a guide. Just make sure the hole will be big enough to get your hand inside. After cutting through the top, remove the stem and put aside for the time being. You should then use your scoop to clear out the pulp and seeds from the inside.
TIP: To make a delicious and healthy snack, save the seeds from your pumpkin and roast them in the oven after making your jack-o-lantern.
Once the insides have been removed, use your knife to cut over the lines you poked into the skin of the pumpkin. After cutting around each shape, pop the pieces out with your fingers and discard them. You can then clean up the areas around the holes to make sure there isn't any extra pulp left behind.
Prolonging the Life of Your Jack-o-Lantern
Once you have cut your pumpkin, you may want to treat it so it will last longer. There are quite a few options for preserving the jack-o-lantern:
- Bleach – Create a solution of bleach and water and put the solution in a spray bottle. Apply the solution to the jack-o-lantern to keep the pumpkin hydrated and free of mold.
- Petroleum Jelly – Coat the inside and exposed flesh of the pumpkin with a thin layer of Vaseline. This will act as a seal, keeping your pumpkin fresh.
- Pumpkin Fresh – As the name implies, this product helps to keep to your pumpkin fresh. This spray-on solution is also an environmentally friendly option.
Lighting
While your cut jack-o-lantern may look great during the day, you'll want it to stand out during the night as well. By placing a light inside, whether you use a real flame or an electrical or battery-operated light bulb, your jack-o-lantern will be shown in its full glory.

Electric or battery-operated light bulbs are the safer option, especially if you have young kids. They are also great, since you can leave them on all night without worrying about potential fire damage. Additionally, these special lights will likely last longer than your candle, which can burn down or get blown out by the wind.
If you are a traditionalist and want to use a candle, there are several things to keep in mind. You should first make sure that the inside of the pumpkin is sufficiently cleared away of any hanging pulp that could catch on fire.
Also, keep the pumpkin a safe distance from your house or any other structure. As an extra precaution, remember to put the flame out before going to sleep to prevent any potential overnight flare-ups.