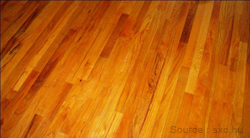
Hardwood floors add a high level of class and warmth to almost any room in any home. They add a natural look to your home and hold heat much better than a lot of other flooring options do. Sure, they can be expensive, but, for many, it is worth it to give this beautiful look to their homes.
Installing wood flooring can be done yourself, but it may also be something you'll want professionals to handle. It takes a good deal of precision and patience to carry out properly. However, this guide should give you an idea of what the process will look like for you or the professionals you hire.
How to Install Wood Flooring
The first thing you'll want to do is mark the positions of floor joists on the walls of the room. You are going to install your flooring perpendicular to the joists. After that, lay down a layer of 15-pound asphalt felt, overlapping the strips by a few inches. Tack the felt into the subfloor with a heavy-duty staple gun. Snap chalk lines to establish the room's center and where the joists are running under the felt and the subfloor.
Your first row of flooring should use the longest pieces you have. You're going to leave half an inch of space between it and the wall it is parallel to, in order to allow for the wood to expand and contract. Don't worry; the space will be covered by the baseboard and molding. Snap a chalk line half an inch from each wall that is exactly parallel to the center line to use as a reference.
Line the first piece of flooring up with the chalk line and use spacers to keep it away from the wall. Drill pilot holes in the face of the wood at each joist, where the baseboard or molding will cover them up, for 1 1/2-inch finishing nails. Hammer them in, but use a nail setter to finish them beneath the surface of the flooring.
Nailing should be done by hand on this and the next two rows at least, until you have room to use the blind nailer. Use a tapping block or an unused piece of flooring to tap the next row's grooves onto the tongues of the previous row. Drill pilot holes for face nailing 1 1/2 inches from the ends of the boards and every six inches down the lengths of them. Use wood putty that's the same color as your flooring to fill in the holes.
TIP: Use spacers on every wall to keep the 1/2-inch expansion gap from closing up.
You can rent a blind nailer, which will take care of most of the rest of the nailing work for you. Use a rubber mallet to hit the nailer down the length each row at the floor joists, hammering in the pieces with the tapping block to get a tight fit first. Once you reach the other side of the room and the nailer won't fit anymore, face nail the boards and use a prybar (with a piece of wood against the wall to protect it) to apply pressure and get the boards locked into one another. Cut the last piece lengthwise if it does not fit and leave room for the expansion gap. Use a circular, bench, or miter saw.
TIP: Always stagger the ends of the boards at least six inches from one another. This may mean you'll need to cut some of them.
Once you're done, install the baseboards and molding. Check out your new hardwood floor!