If you are thinking about putting new siding on your home, you may want to go with vinyl siding. This type of siding is pretty durable, easy to install, and low maintenance. So, if you need to redo the side of your home, vinyl siding is a great and affordable option.
The installation of siding on your home is a complicated process. If not done correctly, the siding won't function properly, which can cause serious damage to your home. Thus, if you are not experienced in home construction, you're better off hiring professionals to do the job for you.
What Is It?
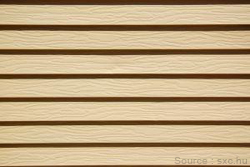
Vinyl siding is made of polyvinyl chloride, more commonly known as PVC. It comes in long strips of several different shapes, each serving a different purpose:
- Siding panels - These are the main components of the siding. The siding panels are thin strips of the PVC that feature interlocking flanges at their tops and bottoms, allowing them to interconnect.
- Starter strips - As the name implies, starter strips are the first panels put up on the home. These are designed to be placed along the bottom of house, and the rest of the strips are placed above them.
- J-Channel panels - When your siding panels come up against a feature (like a window or door), J-channels can be put around the siding as a trim.
- Undersill panels - These are similar to the J-channels, except they are designed to go underneath the windows, rather than around them.
- Corner posts - Corner posts are placed in the corners of the home, covering the ends of the siding panels. There are two different types of corner posts, one for interior corners and the other for exterior corners.
Did You Know?
With vinyl panels, each piece has the color throughout. With other siding options, paint is just applied to the surface, which can eventually start to chip or fade. Since the color of the vinyl siding is on the inside as well as the outside, it will very well last longer than other siding materials.
The Installation Process
The first step in installing vinyl siding is to prepare the walls of the house. This will usually involve stripping the existing siding off the walls and applying new insulation. Then, the contractors will plan the layout for the siding panels, taking into account the locations of all doors, windows, and other features.
Once they have a layout and have taken the appropriate measurements, the vinyl panels will be cut to the right sizes. After being cut, the vinyl panels can be attached to the house.
The next step is to attach the starter strips, J-channels, undersills, and corner pieces. These should be installed by hammering galvanized roofing nails into the nailing slots of the panels. Since the vinyl will contact and expand due to changes in weather, it is important that the nails are not driven all the way through. Instead, they should go in close but still allow the panels to slide around.
Once this framework is up, the rest of the panels can be put into place. The vinyl panels are shaped in such a way that they lock onto each other. After snapping a piece into the place on the bottom, it should be nailed in at the top, keeping in mind the above tips on hammering. Also, the pieces should fit securely behind the corner pieces, J-channels, and undersills.
Depending on your time and budget, you might also want to install vinyl soffits, fascia, and trim to complete your home's vinyl makeover. But if not, you can still enjoy your home with its new vinyl siding. In addition to minimal maintenance, the vinyl siding will make your home look brand new!