Remodeling your kitchen and cabinets can be a difficult yet fun task. There are a lot of areas that can be renovated if you're looking for a new or updated look. Whether you want to just redo your current kitchen or installing new appliances, this guide will tell you how to remodel the different areas of your kitchen, including your cabinets.
When remodeling your kitchen cabinets, you have two options. You can either install new kitchen cabinets yourself or reface them. If you want to take this project on yourself, here is how to approach both ways.
Refacing kitchen cabinets is quicker and easier than installing new ones
If you don't like the look of your current wood cabinets, or if you're just looking for a change, you should consider refacing your cabinets. Tearing them out completely and installing new ones can be both expensive and time-consuming. Assuming your cabinets are in good shape structurally, refacing them can give your kitchen a new look at a fraction of the time and cost.
Step 1: Take down cabinets
First, you'll need to take down all cabinet doors using the appropriate screwdriver or drill bit. Remove drawers as well. Place the doors and drawers on drop cloths. Wipe down the cabinets, doors and drawers with a wet cloth, removing any dirt or grime that's built up.
Step 2: Strip the old paint or finish
You'll need a scraper, a power sander, sand paper (ranging from heavy to fine grit) and a breathing mask. Drawers and cabinet doors should be stripped of paint or finish and refaced separately from the cabinets themselves. If you're dealing with painted cabinets, start with the scraper to remove as much paint as possible. Then, use the power sander, with a heavy-grit paper, to remove all remaining paint.
TIP: You should test the sander on an inconspicuous area to make sure the paper isn't too heavy; if it is, you'll ruin your cabinets.
Once all the paint is gone, switch to a finer-grit paper to smooth out the surface. Excess sawdust will leave behind bumps under the wood finish, so wipe down everything thoroughly with a wet cloth after you've finished sanding. Once the cabinets, drawers, and doors are completely stripped, clean them with a damp cloth or sponge to get rid of the dust; paint won't adhere to dust.
TIP: Oftentimes, cabinets have decorative grooves in them. If you wish to remove these you can fill them with drywall mud, allow the mud to dry, and sand it smooth with a fine-grit sandpaper.
Step 3: Re-color your cabinets
When re-coloring your cabinets, you have the choice of either re-staining them or completely renovating them with fresh coats of paint.
- Option 1: Re-stain your cabinets. To re-stain your cabinets, first pick out a stain you like at your local home improvement store. Use rubber gloves to keep the stain off your skin. Brush the stain on evenly along the grain of the wood and clean up drips as you go. Then, smooth the stain out and brush away the excess using a clean rag. Allow the stain to dry, and, if necessary, apply a second coat. If you want some extra protection, you can top everything off with a polyurethane finish.
TIP: If you're looking for a bigger change, you should consider painting your cabinets instead of refinishing them. There are many more color options with painting than with staining.
- Option 2: Paint your cabinets. To paint your existing cabinets, you'll first need to prime them. Do so using a disposable foam brush, applying two or three coats of primer; remember to paint in the direction of the wood grain. Allow the primer to dry overnight. Then, paint the cabinets the color of your choice. Two coats of paint should be enough, but examine the cabinets carefully, and do any touch up work that's necessary. Repeat the same steps for draws and cabinet draws. Allow everything to dry.
The last step is to reinstall the hardware. You may be happy with your old hardware, but by browsing around your local home improvement store, you may find a new set of hardware that will add a great final touch to your refaced cabinets.
After allowing everything to dry, reinstall the finished cabinets simply screw everything back into place, using the same screw holes. Then, finish this project by putting the cabinet doors and drawers back into place.
Installing cabinets will give your kitchen a completely updated look
New cabinets should be not only aesthetically pleasing, but are sturdy and functional. This guide will give you some pointers on picking out and installing new kitchen cabinets.
Step 1: Pick out the right cabinets for you
There are three types of cabinet construction:
- You can find stock cabinets at your local home improvement store. They are pre-made and easy to install. The drawback is that they only come in a limited variety of sizes and materials; if you've got a very specific amount of space to fill, you may not be able to find stock cabinets that fit. However, they do come in the most popular materials available, and the use of filler strips in spaces between walls and cabinets makes them fit in most kitchens.
- Made-to-order, semi-custom cabinets are a little more expensive than stock cabinets, but allow you more options. Depending on the manufacturer you order with, you'll have options for different drawers, pantries, cabinet sizes and slide outs. You'll also have a broader selection of materials.
- Custom cabinets give you the most options but are the most expensive. You can have them made with any material and in any design. Just contact a custom cabinet manufacturer or a local carpenter to get started.
Here are a few common finishes used for cabinets:
- Wood: Wood has a lot of variety and is easy to paint. The major drawback to wood is the potential for it to warp with time and humidity. This can cause draws to stick and surfaces to become uneven. Wood varies in pricing depending on the type you choose.
- Stainless steel: Stainless steel cabinets fit best in more modern-style kitchens. These are the most durable option and are very easy to clean. However, they tend to show scratches, fingerprints and other marks. Stainless steel is, in general, more expensive than either wood or laminate cabinets.
- Laminate: Laminate cabinets are made up of layers of kraft paper, which are bonded together under extreme pressure, finished with a decorative layer and coated with a plastic sealant. Laminate cabinets have two distinct advantages: they are the cheapest cabinet option and available in almost any color you can think of. The drawback is that they can be chipped, and they're virtually impossibly to repair because the color is only in the surface layer.
Installing new countertops is pretty simple
The easiest way to fit cabinets in your kitchen is to order them. Contractors will measure the space and create countertops to your specifications. Here are some countertops options:
- Installing tile countertops can actually be a good do-it-yourself project. Purchase plywood or plasterboard to be the backing of the counter -- then cut it to size and screw it into place. Then, you set the tiles of your choice on top of the backing. Tile is easy to clean, and broken tiles are easily replaced.
- Stainless steel - Stainless steel is the heaviest and most durable countertops option, but shows fingerprints and other marks very clearly.
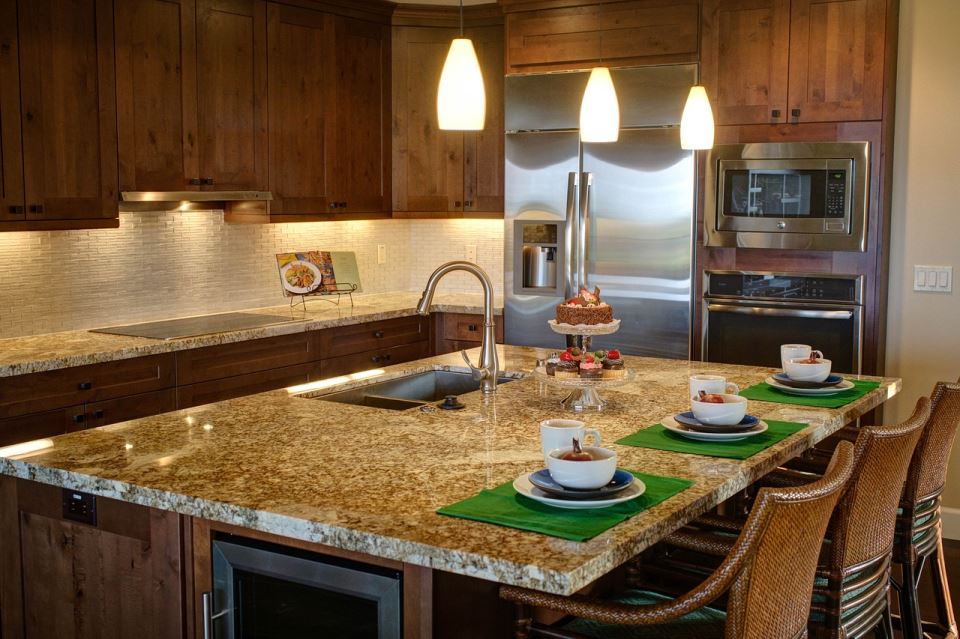
- Solid stone countertops (granite, marble, slate, quartz, etc.) like these are becoming more and more popular all the time. They are very durable and look great.
- Laminate is your cheapest countertop option, but laminate can be difficult or impossible to repair if damaged.
Other ideas to bring your kitchen to life
There are many different floorings you can put into your kitchen. Here are some ideas on installing new floors or redoing your old ones:
- Install or refinish wood floors
- Install or repair wall-to-wall carpeting
- Install or repair tile
Here are some other areas you could look into as part of your kitchen remodel:
- Painting or wallpapering
- Replacing appliances
- Installing window treatments (shutters, curtains, blinds)
- Purchasing new drapes
- Purchasing new dish towels
- Purchasing other new décor items
- Installing new door/window trim, crown molding, etc.
Those should be more than enough ideas to get you started on your remodel. Just picture your kitchen as a blank canvas and get started!