Stripping and refinishing furniture is a great project for do-it-yourselfers. It’s not a difficult task and, once you’ve mastered the skills, you’ll be able to buy any piece of wooden furniture you want, at a flea market or thrift store, and change it’s finish so that it matches your décor. This is about a three-day project.
SuppliesHere’s what you’ll need for this project:
-
Sandpaper or a foam sanding block
-
Lint-free rags
-
Newspapers
-
Drop cloth
-
Paint tray
-
Polyurethane or wax finish (your choice of high-gloss, satin, eggshell, etc.)
-
Wood stain (in your choice of color)
-
Foam brushes (to apply the stain)
TIP: Ask someone at your local home improvement store to help you select a stain and a finish. Ask what would be best for the piece you’re working on.
Day One: Sanding the Piece
First, set up a spot in which to sand your piece. Working outside would be best, since it would save you from having to clean up all that dust. If you must be inside, choose a well-ventilated spot, and cover everything in the room with drop cloths. Now you can start sanding the piece. Start with coarse sandpaper, using an even hand so you don’t gouge the wood. Work your way to a medium-grit sandpaper and then fine. You want the wood to be smooth and even-feeling.
When you’ve finished sanding the piece, wipe it down with a damp lint-free rag (twice, if necessary), and then again with a dry one. You can also clean the wood with mineral spirits, which will help bring out the color variation in the wood. Applying wood conditioner is also a good idea; it will help the wood absorb the stain.
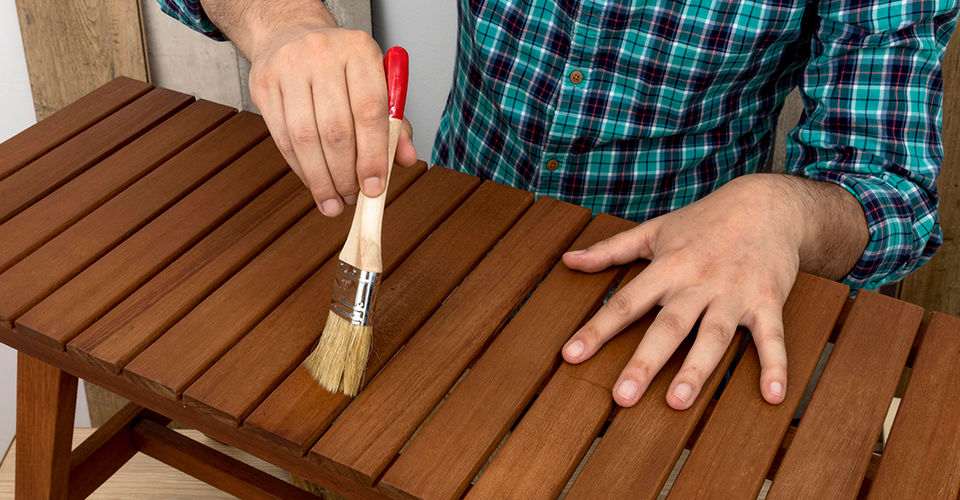
Day Two: Staining the Piece
Protect the floor you’ll be working on by laying down a plastic or canvas tarp and a layer of newspaper. The newspaper will absorb any stain drips. Put your piece up on some wooden blocks. This will allow you to work on it without having to be bent over the whole time.
Next, shake up the can of stain and stir it thoroughly before pouring some into your paint tray. Keep stirring the stain as you go about staining, keeping it properly mixed. Stain the piece in sections, going from the least to the most noticeable sections. After the piece is stained, use lint-free rags (you’ll need lots of them) to wipe off the excess stain. This will allow the grain of the wood to show through more clearly. The can the stain came in may give you more specific instructions on applying the stain and wiping it down. Allow the stain to dry for about 24 hours; don’t move on to the last step until the stain is completely dry.
Day Three: Applying the Finish
Go over your piece one last time to make sure there aren’t any rough spots. If there are, sand them down gently with fine-grit sandpaper, being extra careful not to remove the stain. Wipe away the dust that’s left behind. Finally, apply your polyurethane or wax finish, following the instructions found on the packaging. Allow the finish to dry, and your job is complete!