 Musical instruments are extremely delicate and should be handled very carefully. They can easily break during a move if not packed and moved the proper way. Here are some tips and tricks on packing and moving three of the most common musical instruments safely to avoid damaging them.
Packing a piano for moving
Although there are special moving services for heavy instruments like a piano, you can prepare and pack it for a safe move by following these steps:

-
Secure the keyboard lid via lock or moving straps (adhesive will ruin the wood).
-
Wrap the entire piano using moving blankets.
-
Secure all padding with tape while being careful not to get any wood surfaces.
-
Lift the piano carefully, keeping it in the upright position. Make sure that you don't lift it by the legs as they are quite delicate.
-
Then strap the piano onto a dolly, running two moving straps diagonally underneath the piano.
-
Lock the casters in place to keep the piano stationary.
-
When the piano is loaded on to the truck make sure that it's securely tied down and placed against the truck's wall to restrict any movement during transit.
Professional piano movers often partially disassemble a grand piano before its relocation, removing the lid, the lyre and legs. Upright pianos, on the other hand, are moved without any disassembly as they do not have removable lyres or legs. However, their inner workings are even more delicate than a grand piano, and they cannot be tilted while being lifted.
Please note that once your piano is moved into your new home, you will have to tune it. No matter how carefully you move your piano, the slightest movements can disturb the mechanisms. Call a professional tuner to have your piano making beautiful music once again.
Packing an organ for moving

-
Close the keyboard lid, and if possible, lock it.
-
If the piece can be disassembled, remove the pedal board and the bench from the console and pack them separately.
-
Use extra bubble wrap to wrap the legs and the pedals.
-
Secure the body using moving blankets to provide extra padding.
-
Pad and move the bench separately.
-
If you are not hiring any professionals, moving dollies can be hooked on to either side of the console, thereby making it easy to roll it towards the moving truck.
TIP: Federal regulations prohibit the transportation of ivory, so keys will need to be removed beforehand, unless you can prove the item was manufactured 100 years ago. However, any organ repaired in the past 100 years will be disqualified from the antique exemption.
Packing brass or woodwind instruments, like trumpets or saxophones

-
Start by disassembling the instrument in small parts and place them inside a velvet lined hard case containing slots for all the pieces.
-
If you don't have a case, wrap each piece in layers of bubble wrap and arrange a box that's spacious enough to fit all the parts.
-
Keep the wrapped pieces inside the box and secure them with a layer of padding by making use of materials like inflatable pillows, towels, or packing peanuts.
-
Make sure that the packing peanuts don't get inside the instruments and all the pieces are kept in a way that they don't collide during transit.
Packing drums for moving

In order to pack your drums safely and securely, make sure you use high-quality moving boxes and packing materials from a moving supply retailer. You should avoid using free boxes to pack something as heavy as drums since boxes like these could be flimsy and collapse under the weight of your drums.
-
Packing materials required to pack your drums
Tip: When choosing a box for your drum, make sure it is larger than the drum.
-
Prepare the drums for moving
-
Disassemble the drum set and keep all small parts and hardware in a separate bag for reassembly later. Wrap the bag in bubble wrap for protection and label it so you can recognize it easily during the unpacking process.
-
Remove the legs from the drum set and wrap each piece individually with bubble wrap.
-
Remove the heads from each of your drums. This will allow you to pack the smaller drums inside the larger ones, which will save space during your move. Removing the head also helps prevent damage to the skins during transit.
-
Take your cymbals off their stands and fold up the stands properly.
-
Packing the drums
-
Cushion the box - Place a layer or two of bubble wrap, foam peanuts, or crumpled packing paper on the bottom of your moving box to cushion your drums.
-
Wrap each one of your drums in bubble wrap (preferably the kind with larger bubbles), and secure with tape, using extra bubble wrap on the sharp areas.
-
Place the bass drum inside your moving box.
-
Follow with your other drums, going in size order from largest to smallest.
-
Place your labeled bag of drum hardware on top of the 13-inch tom (you can leave the head on this tom since it's the smallest drum and you won't be putting a smaller drum inside it).
-
Bubble wrap the box's corners carefully.
-
There should be no empty space in the box. If there is any empty space, make sure to fill it with packing paper, bubble wrap or foam peanuts to limit movement and shifting during transit.
-
Place the heads on top of the drums, from smallest to largest.
-
Add more packing materials on top of the bass drum heads.
-
Seal the box securely with tape on the top and bottom, to reinforce the box and prevent it from collapsing during your move.
-
Put your cymbals and cymbal stands in padded cases. Make sure to carefully label which cymbal goes with which stand for easy reassembly later.
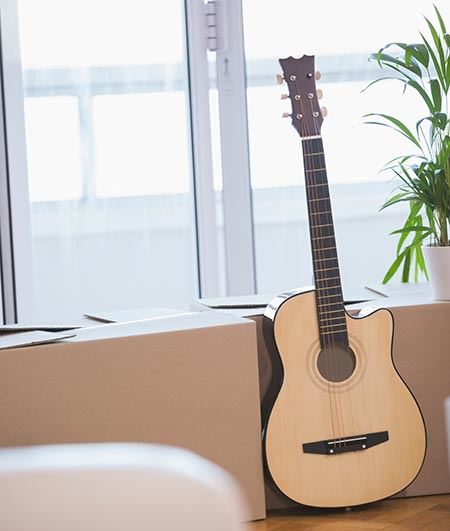
Packing a Guitar for Moving
If you own a guitar, you probably already have a case for it. But, sturdy as they may be, guitar cases don't actually provide sufficient protection for your prized instrument during a move-a process in which items can easily be jostled around in the back of a moving truck.
Here are some tips to follow for packing a guitar to ensure that it reaches your new home safely:
-
Get a guitar shipping box
Get a moving box that will fit the guitar snugly. Make sure that once the guitar is inside its box, it won't have room to move around during transit.
Tip: The correct size for a guitar shipping box is approximately 50" x 20" x 9". Contact your local UPS store and see if they carry guitar shipping boxes. Many moving and shipping supply stores don't normally carry these specialty boxes, so they will probably have to order one for you. Make sure you call in advance before you plan to begin packing.
-
Preparing the guitar
Before packing your guitar, there are a few things you have to do first:
-
Loosen the strings. When the strings are tight, they may snap during the move while your guitar is being handled or placed on the moving truck. Tight strings can also place unnecessary tension on the neck of your guitar during the move.
-
Remove the guitar strap and any other parts that may be attached to the instrument. Pack them separately to prevent damage to the guitar. Other detachable parts might include capos, tools, bridge covers, and a whammy bar, among others.
-
Wrap all loose items and detachable parts in bubble wrap or paper towels, place them inside a plastic bag, and tape the bag shut to secure it.
-
Label the bag. After wrapping all the items, close the bag and label it so you can easily find these parts later.
-
Wrapping and packing your guitar
-
Wrap your guitar in unprinted newspaper, paper towels, or old blankets and t-shirts. This will provide an additional layer of padding for the guitar. Caution: Do NOT use any bubble wrap or packing peanuts, as these materials can damage the instrument.
-
Place the wrapped guitar inside the box. Make sure that your guitar fits snugly inside the box.
-
Fill empty spaces with crumpled newspaper to keep the guitar stationary.
-
Cushion the headstock of the guitar by placing an extra layer of padding between it and the box to provide maximum support. Make sure that the guitar is placed in the box with the headstock facing upwards.
-
Close the box and secure it with packing tape.
-
Label the box clearly on all sides and mark it as "Fragile".
Packing a Violin for Moving
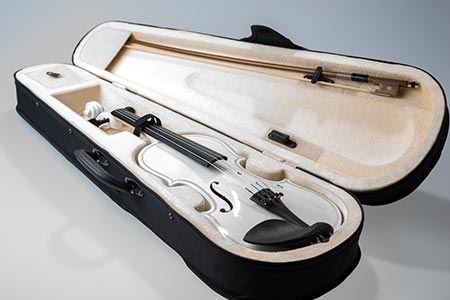
In order to pack your violin, you'll need the following supplies:
-
A roll of paper towels or cloth rags (smooth and soft)
-
A cardboard packing box at least four inches wider than your violin case
-
Packing peanuts or packing paper
-
Plastic zip bags
-
Bubble wrap
-
Packing tape
- Disassembling violin
Before you pack your violin, you'll need to disassemble some of the parts. Here are some steps to remove the fittings of the violin before packing:
-
Place a folded paper towel or cloth rag underneath the tailpiece.
-
Loosen the strings until the bridge of the violin comes loose, then carefully remove the bridge and set it aside.
-
Wrap the removed bridge in a soft cloth or paper towel.
-
Remove the tailpiece.
-
Carefully remove each string and all other fittings and place them into a plastic zip bag.
-
Now, place a folded paper towel or a soft cloth under the neck of the violin when packing it away.
If you do not wish to remove the fittings before packing, be aware that you will need to know how to tune your instrument correctly once you have unpacked it after the move. In this case, you will need to:
-
Tune your strings down a whole step and place a paper towel or a soft cloth under the strings of the violin to avoid having the strings snap during transit.
-
Wrap both the tailpiece and fingerboard with some paper towels for extra protection.
- Wrapping and packing the violin with its case
Once you have either removed the fittings or carefully protected the fittings, you can then place your violin in a carrying case. This is the best place to secure it during the move since it is specifically designed to minimize shifting. However, if you want to provide further protection for your violin, you can:
-
Pad the entire violin with a soft cloth or paper towel to ensure that there is absolutely no movement during transit.
-
After the violin is securely stowed in its case, you can wrap the case in a thick layer of bubble wrap and secure with packing tape.
-
Slide the bubble-wrapped case slowly into your cardboard moving box.
-
Fill any empty space with packing paper or packing peanuts.
-
Close the box and reinforce with durable packing tape.
- Packing the bow
While packing a violin bow may seem as simple as placing it in the case along with the violin, there are some extra measures you need to take to ensure that the bow is not damaged during transit.
Here's is what you'll need for packing a bow:
Here are the steps you need to follow to pack a violin bow:
-
Violin bows are extremely delicate and susceptible to damage from dry air or extreme temperatures, both of which are risk factors when shipping your violin. So, make sure to loosen the bow hair all the way to prevent the bow from snapping.
-
Once you've done that, wrap the bow with bubble wrap carefully and place it in a bow case or PVC pipe.
-
Fill the empty space of your bow case or PVC pipe with packing material to make sure that the bow does not move.
-
Next, gently place the PVC pipe or bow case into another box that is shipping ready. Make sure that the moving box is slightly larger than the PVC pipe or bow case.
-
Close the box and secure it with packing tape.
Tips to remember when moving instruments
Moving instruments on your own is possible, but at the end of the day, it comes down to your personal preference and budget. While smaller instruments like flutes and trumpets are easy to carry, bigger ones are hard to maneuver and are susceptible to damage.
Here are some useful tips to remember while moving heavy musical instruments:
-
Use a large furniture dolly or a hand truck and a few moving blankets to use as protection from damage or scratches during the move.
-
Drape a thick moving blanket over the dolly or hand truck to cover any metal that can potentially scratch or damage the instrument you are moving.
-
When lifting anything that needs multiple helpers, position one person at each corner. This will be the best way to distribute the weight among each person.
-
Use your legs and not your back while lifting heavy objects. Bend your knees and use a squatting motion to gain leverage and prevent any back injuries.
Hiring movers that specialize in moving large instruments is the smartest, efficient, and most stress-free method. If you want to move your musical instruments without any hassle, we are here for you. Movers.com can connect you to many professional moving companies that specialize in packing and moving delicate items, including musical instruments. All you need to do is fill out our no-obligation quote form to get free estimates from moving professionals in your area!